Today’s goals:
- Finish internet and computer security discussion
- Images: where to find them and how to edit them for your webpage
Today’s featured website:
- http://willthefuturebeaweso.me/– Find out now!
Internet & Computer Security Basics
- Periods 5 & 6: do this quick reflection to let me know at least one thing you learned yesterday
- Period 5 only: let’s pick up where we left off yesterday
Finding images
- Bad = downloading, using, helping yourself to whatever you find on Google (illegal, unethical, wrong)
- Good = using things freely available under Creative Commons licensing and from websites where people give explicit permission for their image usage.
- Great resources for finding images to use with your web projects:
- https://stock.tookapic.com/
- https://unsplash.com/
- https://www.pexels.com/
- Bing.com (do image search, then search for free to share and use)
- You must ONLY use these sites, or one that you find that I approve, for ALL of your projects this year. No exceptions! It is useful to build good habits now so you won’t have problems later.
- Even if we’re just testing and experimenting, you must only use images you find from these sources.
- Quick test– use whatever site you want to find an awesome photo of an elephant. Go!!
Image Editing Basics
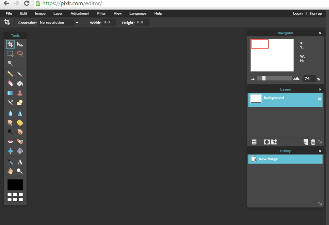
- To make our lives a bit easier, we’ll use a good web-based image editor, https://pixlr.com/editor/. Pixlr.com is actually pretty similar to Photoshop.
- Basics– layers (concept, order, hiding, properties), history, selecting, copying & pasting
- Color panel– hex and hsl values
- Resizing and cropping images
- Color correction– curves, color balance
- Adjustment layers
- Filters
- Adding text Color, size, font, drag into place
- Cool tools- eye dropper tool to match colors, pixel copying with selection tool
- Black and white/color photo
- Save options– resolution and file formats
Pixlr.com Boss Image Challenges
- Go to Pixrl.com/editor to do the following activities at your own pace. You will submit them online to our class image gallery (see one from last year for an example). This is your chance to show me that you have the maturity to handle online collaboration tools.
- You will edit and upload 5 images
- Crop and resize an image
- Download this photo and open it in Pixlr.
- Double-click the lock icon next to Background in the layers panel so you can edit the image.
- Crop around the kitten so the photo is vertical rather than horizontal (taller than it is wide). Then resize the image so it has a width of 200 pixels. Save the photo and submit it below with your name and #2.
- Video hint here
- Submit here along with Your Name, #1: Period 5 or Period 6
- Color correct an image
- Now, take that same kitten photo, and in your history panel, click open image to go back to the original image.
- You’re going to use some settings under the Adjustment menu at the top to change the colors of the photo. Go to Adjustment, Brightness and Contrast and play with some of those settings until you get something you like. Then go to Adjustment, Color Balance, and select different values for the mix of Red, Green, and Blue. Finally, go to Adjustment, Curves, and check the box next to histogram. Play with the darkness and lightness of the photo by dragging the line around until you get a result you like.
- Submit here along with Your Name, #2: Period 5 or Period 6
- Add a frame to an image
- Find an image you like from https://unsplash.com/, https://www.pexels.com/, or Bing.com.
- Go to Image, Canvas Size, select the middle box, and add 100 pixels to both the width and the height.
- Now choose the color picker tool (next to the letter A in the tool bar), and click on a color in the photo that you want your frame to be so you can match your frame to your photo. The color you click on will automatically appear in your color panel. Now choose the paint bucket tool and click in the white space around your photo to color in the border.
- Video hint here
- Submit here along with Your Name, #3: Period 5 or Period 6
- Add fun filter/adjustment layer to an image
- Use an image you already have or get another image you like from https://unsplash.com/, https://www.pexels.com/, or Bing.com.
- Under Adjustment and Filter, there are several options to make your photo more visually interesting (sepia, solarize, blur, glamour glow, etc., etc.). Choose one or more to make a cool-looking photo that’s different than the original. Don’t just mess it up; make something look good!
- Submit here along with Your Name, #4: Period 5 or Period 6
- Create colorized area in black and white photo
- Download this photo and open it in Pixlr.com.
- Reminder- double-click the lock icon next to Background in the layers panel so you can edit the image. Then right click on the layer and select Duplicate layer.
- Now, make sure you’re on the layer copy (it should be highlighted in the layers panel) and go to Adjustment, Desaturate, to make the layer copy black and white.
- Now, select the eraser tool (next to the paint bucket) and be sure to change the brush size to something reasonable (not too big or small). You’re going to erase away the top black and white layer to reveal the colored photo beneath- do this JUST for the rose bud.
- Submit here along with Your Name, #5: Period 5 or Period 6
- Extras
- Try making a fake ad like this guy did in this video. Get a photo you like from Pexels, Unsplash, or Bing and find a logo to use.
- Make anything else you want.
- Remove image from background, add to new background
- Download this cute dog photo and open it in Pixlr.com. Also download and open this image.
- You’re going to remove the puppy on the blanket from his background using the magic wand tool. You will then add him (or her) to the image of the other dogs sleeping on the bed.
- First, use the magic wand tool to click on the white background/blanket. That should highlight most of what you want (excluding the dog). Try this a few times until you get it right (remember to adjust the tolerance level). After just the background is selected, go to edit, clear. This should leave just the dog. Now, get the eraser tool and erase away any little remaining bits you don’t want.
- Use the magic wand tool to highlight just the dog. Then go to edit, inverse selection, and copy the dog by hitting ctrl c on the keyboard. Paste the dog in the other photo and move it around with the arrow tool to put it into place with the other dogs.
- Video hint here
- Submit here along with Your Name, Extra: Period 5 or Period 6