Today’s goals:
- Check your grades (see your rubric) and see me if you have questions
- Finish the CSS3 photo gallery
- Practice CSS positioning
Today’s featured website:
- https://photoworld.com/how-big-is-snapchat/– What do you think?
Check out your Harvest of the Month media:
- school webpage, school/city Facebook, school/city Twitter
- They are scheduled to post on our social media on the days kale is being served
CSS3 Photo Gallery:
- In pairs (with the person next to you), go through each’s others code and see if you can catch mistakes and help each other fix them. Remember, you can always look at the demo and view the code as a reference. Here is the tutorial link again if you need it.
- After you’re done working in pairs, we’ll go over the code together.
- Some new things: z-index, CSS3 transforms (rotations)
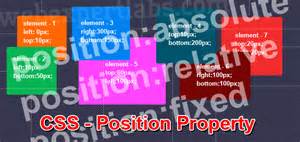
CSS Positioning Practice
- We began practicing with CSS positioning in class on November 6
- Remember:
- IDs Preceded by # on style sheet. Used to identify one element and generally used to identify specific sections of a webpage (ex. menu, header, sidebar)
- In the body section of your webpage, you use div tags to refer to IDs you created in your style sheet. For example, div id=”wrapper” or div id=”menu”
- Divs: Divs are specific areas of a webpage contain your content (text, images, links, etc.). They are referred to as divs (div id=”something”) in your HTML. They can be positioned with specific properties and can overlap. They can also have classes applied to them.
- Positioning divs on a webpage: Divs can overlap and are positioned either from the top left corner of the webpage (absolute) or in relation to their usual positions on the page (relative). Divs can also have a fixed position, which means they don’t move as you scroll along the page and stay in the same place. It is possible to put one div inside another and position them differently. Top, right, left, and bottom values are used to tell the browser where the div should be positioned on the page. The values can either be in pixels or as a percentage, which are relative to the parent element’s dimensions (example, a webpage that’s 900 pixels wide or a table that’s 500 pixels wide).
- We’re going to set up a new webpage and you can use your css layout 1 page from Nov. 6 for reference:
- First, start a new page in Notepad++ and call it css_layout_practice2.html
- Set up the page with the basic tags to start: html, head, title, body. Don’t forget to both open and close the tags. It’s OK to look at your other webpage projects for guidance.
- Now, add the tags for a style sheet: style type=”text/css” and the closing tag; both of these should be in the head section. You will be adding things to your style sheet soon.
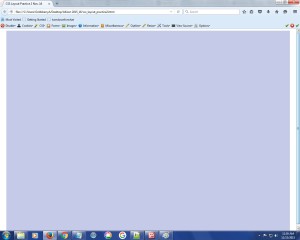
- The first thing you’ll add to your style sheet is a body declaration with a background color of white. Add body { background-color: white; } to your style sheet.
- Next, let’s set up a page wrapper. Add a #wrapper declaration to your style sheet that has a height of 100% and a width of 1200px #wrapper { width: 1200px; height:100%; }
- Let’s make sure to add div id=”wrapper” right below the body tag in the HTML. Don’t forget to close the div before the closing body tag.
- We need to add some more properties to our #wrapper in the style sheet. Add a background-color of #C5CAE9. Let’s also add some margins and padding. Set margin-top and margin-bottom to 0px and margin-right and margin-left to auto. Padding should be 5px. Again, go ahead and peek at another page you’ve worked on to get the code right. What you have so far:
- We are going to set up a page with 3 sections: a header, left section, and right section. Let’s begin with a #header that has a width of 1200px, a height of 75px, and a background-color of #9FA8DA. Don’t forget to add div id=”header” below div id=”wrapper” in the HTML and make sure to close that div tag. Write “my header” in there so you can keep track of your div tags.
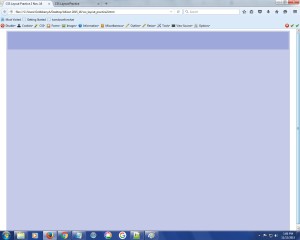
- Let’s add some more things to our #header in the style sheet- position: fixed; margin: 0px; padding: 1px; z-index: 2;
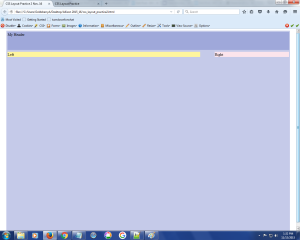
- Let’s add a #left and #right section below the #header. Your #left section should have a width of 65% and a background-color of #FFF59D. Your #right section should have a width of 25% and a background-color of #FCE4EC. Both sections should have position: absolute, padding: 1px, and height: auto. Margin-bottom and margin-left for the #left section should be 0px each while margin-top should be 85px and margin-right should be 30%. Margin-right and margin-bottom for the #right section should be 0px each while margin-top should be 85px and margin-left should be 70%.
- Now, add your div tags in the HTML, div id=”left” and div id=”right”. Make sure you close your div tags inside the wrapper’s closing div tag! Write “left” in the left section and “right” in the right section.
- Let’s pause and think/discuss for a second: why does the header have a z-index of 2 (hint-scroll to see what happens). Why do the left and right sections have a top margin of 85px? Why do the left and right sections have page widths as percentages? What does height:auto mean?